by Bethany Conkel
*You can find Bethany's 12 Days of Christmas post HERE.
I have two special crafts that I would love to share with you today. The first one is for families who are currently carrying to term after a fatal diagnosis. The next is for families who have already said goodbye to their sweet babies and still want to create something special.
For families who are currently carrying to term here is a wonderful activity that you can do in the hospital the day your baby is born to make sure you can incorporate your sweet one in all future Christmas seasons. It does not matter what month you are going to deliver, you can still do this activity. Many times craft stores will carry the supplies year round. We made this ornament when my baby was born in September so we would be ready for that Christmas!
Create this ornament using StazOn Ink Pad (click here for product description)
StazOn is designed for slick surfaces like glass, metal, plastic, leather, or paper; it is not intended for fabric.
Supply list:
* Your color choice of StazOn Ink Pad, which can be purchased at Michaels, JoAnn fabrics, or Amazon.
* StazOn Ink Remover, which can be purchased at some Michaels, JoAnn Fabrics, or Amazon.
* Glass, ceramic, metal ornament of your choice. We recommend an ornament that has a flat surface to make it easy to capture hand/footprints. We purchased ours at Michaels.
Directions:
When it is time to capture your baby’s print, press hand or foot firmly on the ink pad until the hand or foot is evenly and thoroughly covered with ink. Before ink has time to dry, quickly make print by pressing hand or foot firmly onto your ornament (or other item). Make sure to press each finger or toe individually to be sure the ink transfers thoroughly and completely. Next, gently lift hand/foot away from the ornament to make sure it does not smear. Your ornament should dry within minutes. Re-ink between each print if you are making multiple ornaments. When you are finished making all your ornaments, use the StazOn ink remover to clean hand or foot. Using just soap and water will not work due to the type of ink. The ink remover will be needed to fully clean the ink off your baby’s skin. Using disposable chucks or baby wipes can help this process.
Enjoy your child’s treasured print!
This next craft is for those who have already said good-bye to their baby.
Supply List:
* Candle
* Tissue paper
* Wax paper
* Tape
* Hair dryer or heat gun
* Image you would like to use. We suggest using a scanned copy of your baby’s hand or foot prints, or an ultrasound, or favorite picture.
* Printer
Directions:
Find a copy of your baby’s footprints (or your preferred image). Scan the image. If you would like and are able, you can clean them up in a photo editing program like photo shop, but this is not necessary.
Cut a piece of Tissue Paper a little smaller than a regular piece of printer paper.
Tape the tissue paper to the printer paper. If your tissue paper has a shiny side and a dull side, be sure to tape it so you are printing on the dull side.
Put your prepared paper in your printer so that it will print on the tissue paper and print your image.
Carefully cut out your image. You will want to cut very close to your image so you do not have much border left.
Place the tissue paper image on your candle.
Wrap your candle with wax paper and hold it firmly around the candle. Make sure you do not let the tissue paper slide around on your candle.
Use a hair dryer on high to heat the wax paper. You might want to use an oven mitt if it gets too hot for your hands.
You will see the wax paper start to melt some, keep using the hair dryer until this happens to each section of your image.
Once the wax paper over your entire image looks like it has melted / heated up, carefully remove the wax paper.
You are finished. Enjoy your special candle in memory of your baby!
Showing posts with label Craft Ideas. Show all posts
Wednesday, December 10, 2014
Monday, December 8, 2014
12 Days of Christmas: Day Eight
Facing the holidays without your baby, or when you know your baby's life is going to be short, is overwhelmingly hard. Please, above all else, be gentle with yourself.
If you'd like to connect with other loss families facing the holidays without their children, you can join the private group on Facebook, HERE.
We hope you find peace and healing in the days to come <3.
~ ~ ~
Day Eight
This is technically our second Christmas without Hannah. Hannah was born on December 23rd, 2013 and we came home from the hospital on Christmas Day. In addition to losing Hannah in December, we also received the devastating news on December 5th, 2013 that she wouldn’t live.
I used to love Christmas, and in one way I still do because it is the celebration of the birth of Jesus, but to be honest, that’s the extent on my love and joy for Christmas this year. Last year, even though I knew the terrible truth, I had Hannah alive leading up to Christmas. That was much different than Christmas day 2013 and this year’s Christmas season. There are so many emotions. So many hopes and dreams that are shattered; Christmas seems to just highlight that reality.
I’m going to separate this into three parts based on how things unfolded for my husband and me.
Carrying Hannah to Term (December 5th- 22nd, 2013):
- We went to visit and get our family picture taken with Santa Claus. ]
- We had a 3D ultrasound done and put Hannah’s heartbeat in 3 stuffed animals. We gave each of our mothers one (we let them choose the animal).
- I baked and made goodies with my husband and mom. I made sure to eat those special Christmas goodies so Hannah could taste them too.
- We watched our favorite Christmas movies with Hannah (Frosty, Mickey’s A Christmas Carol, Rudolph, etc.).
- For the first time, my husband and I put up and decorated a real Christmas tree in our home.
- We got special ornaments for Hannah.
- We got books for Hannah as presents for Christmas (Pat the Bunny, The Night Before Christmas, If You Give a Mouse a Cookie, and 3 Little Critter books).
- Decided to make Hannah her own special and custom Christmas stocking, just like my great grandmother made for me.
- Watched a Christmas parade and enjoyed hot chocolate with Hannah.
- We even enjoyed Christmas shopping with her.
Our first Christmas without Hannah (December 23rd, 2013 – January 1st, 2014 when we were in the hospital and first week at home):
- We read to Hannah the book, The Night Before Christmas, in the hospital.
- We took a family picture with Hannah and the heartbeat giraffe in the hospital.
- We put the books we got her for Christmas under the tree along with her special ornament.
- I made Hannah’s Christmas stocking.(I've created a tutorial below so you can make your baby a special stocking).
The current Christmas season:
- Put Hannah’s name on her Christmas stocking and hang it with the rest of my family’s.
- Try my best to enjoy the Christmas season for Hannah.
- Get a family picture taken with Santa Claus and include Hannah by bringing Hannah’s heartbeat giraffe.
- Buy Hannah her first doll and stroller.
- Put up and decorate a small, real Christmas tree in our home.
- Put up a small, real Christmas tree at Hannah’s grave.
- Decorate Hannah’s grave with Christmas items.
- Give a frame to family of Hannah’s retouched photo as a gift.
- Light a Christmas votive for Hannah on her birthday through New Year’s Day.
- Take a family picture with Hannah’s heartbeat giraffe on Christmas Day.
I pray that in some way my words and ideas can bring you hope and comfort. I am praying for you and sending all of my love to you, especially during this Christmas season. May it be gentle and filled with love.
DIY Christmas Stocking
You will need:
A stocking
Scissors
Needle and thread (in matching colors to your decoration pieces)
Decorations
Glue (that will work on felt/fabric)
Fabric/felt (in your choice of colors and prints)
A stocking
Scissors
Needle and thread (in matching colors to your decoration pieces)
Decorations
Glue (that will work on felt/fabric)
Fabric/felt (in your choice of colors and prints)
- Decide how you would like your baby’s stocking to look. I just kept Hannah’s Christmas and giraffes.
- Find patches, lace trim, appliqués, felt in colors/prints, and other decorative items you like.
- Before attaching your items, place them on the stocking to make sure you like the overall look.
- Start attaching you pieces to the stocking, start with the larger pieces first.
- Sew or attach your baby’s name at the top of their stocking.
- If you have to use glue, make sure to let it dry and set on a flat surface.
- You’re all finished and your baby’s stocking was made with nothing but love.
~ ~ ~
Heather Kimble lives in the Philadelphia area. She is married to her best friend, Jason and is mommy to Hannah Sue Kimble. Hannah is her only child. Heather carried Hannah after receiving a fatal diagnosis and was told to terminate. Heather was told to terminate based on the serious risk to her own personal health. She doesn't believe in termination and chose to carry Hannah with love. Hannah passed away and was born sleeping on December 23rd, 2013. Heather and Jason treasure every moment they had with Hannah during pregnancy and after delivery. Hannah has inspired a nonprofit started by her parents to help others and to help break the silence by sharing their journey of baby loss. Visit her blog, Hannah's Heart and Love, and follow her page on Facebook.
Sunday, December 7, 2014
12 Days of Christmas: Day Seven - Luminary Craft
DIY Remembrance Luminary
by MaryJo Carlson
You will need:
* a glass vase
* stick on decorations of your liking including ribbon and decorative tape. You can get these in the scrapbook section of stores.
* Stick on letters for their name or you can use markers or paints made specifically for glass
* Beads, feathers, butterfly’s, shells, wire, etc. (optional}
* Avery clear sticker project paper (office products store) or you can use printer paper and white glue
* Sand and candle
* Picture/ultrasound photo of your baby/grandbaby or a picture of something that reminds you of him/her/them. CarlyMarie’s seashore of remembrance photos work really well.
1. Assemble all of your items and begin by washing and drying your glass vase so the surface is clean and completely dry.
2. Print picture onto Avery sticker paper or printer paper* making it size appropriate for your vase.
3. Cut out picture and apply it carefully, smoothing it as you go. * If you are using printer paper make a mixture of white glue and a bit of water. The end product should be the consistency of milk by mixing completely. Using a small artist’s brush to apply completely cover the back of the picture with this mixture. Carefully apply to the vase smoothing with your hand as you go. You will need to smooth it occasionally while it dries as well so as to adhere completely.
4. Apply your decorations. You can be completely creative with this. Also add beads, shells, feathers using a hot glue gun to affix it to the vase. Adding sticker letters of the babies name is a wonderful touch or other sayings as well. This is completely your masterpiece; enjoy completing it however your creativity takes you.
5. Fill bottom of vase with sand and add votive candle. A battery operated votive candle works really well.
Display in a special spot and remember your beautiful child while you watch the light glow from within.
by MaryJo Carlson
![]() |
| art on luminary by Carly Marie |
You will need:
* a glass vase
* stick on decorations of your liking including ribbon and decorative tape. You can get these in the scrapbook section of stores.
* Stick on letters for their name or you can use markers or paints made specifically for glass
* Beads, feathers, butterfly’s, shells, wire, etc. (optional}
* Avery clear sticker project paper (office products store) or you can use printer paper and white glue
* Sand and candle
* Picture/ultrasound photo of your baby/grandbaby or a picture of something that reminds you of him/her/them. CarlyMarie’s seashore of remembrance photos work really well.
1. Assemble all of your items and begin by washing and drying your glass vase so the surface is clean and completely dry.
2. Print picture onto Avery sticker paper or printer paper* making it size appropriate for your vase.
3. Cut out picture and apply it carefully, smoothing it as you go. * If you are using printer paper make a mixture of white glue and a bit of water. The end product should be the consistency of milk by mixing completely. Using a small artist’s brush to apply completely cover the back of the picture with this mixture. Carefully apply to the vase smoothing with your hand as you go. You will need to smooth it occasionally while it dries as well so as to adhere completely.
4. Apply your decorations. You can be completely creative with this. Also add beads, shells, feathers using a hot glue gun to affix it to the vase. Adding sticker letters of the babies name is a wonderful touch or other sayings as well. This is completely your masterpiece; enjoy completing it however your creativity takes you.
5. Fill bottom of vase with sand and add votive candle. A battery operated votive candle works really well.
Display in a special spot and remember your beautiful child while you watch the light glow from within.
~ ~ ~
MaryJo Carlson and her husband David have five children. Their oldest daughter is RaeAnne Fredrickson who started All That Love Can Do in memory of her beautiful son Samuel Evan. MaryJo is a stay at home mom and grandma who now spends her time finding ways to bring light and encouragement to others who have had to say goodbye to their precious grandbabies way too soon.
Saturday, December 6, 2014
12 Days of Christmas: Day Six - Holiday Dish Craft
Christmas without you/ Christmas with you
I need little rituals.
I need gifts from the world.
It's how I keep my daughter close.
For the holidays, I wanted to do a small ritual every day. While we trim the tree, while we cook, wrap presents or read stories by the fire. While my husband plays that same Christmas carol CD for the upteenth time.
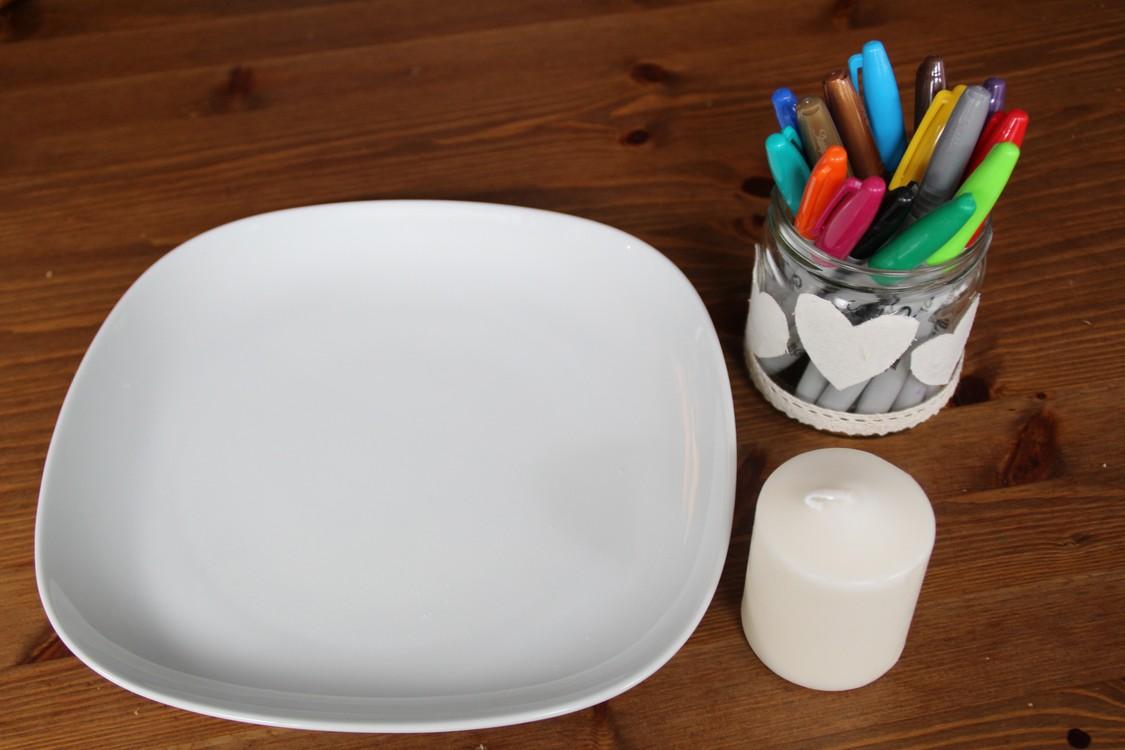
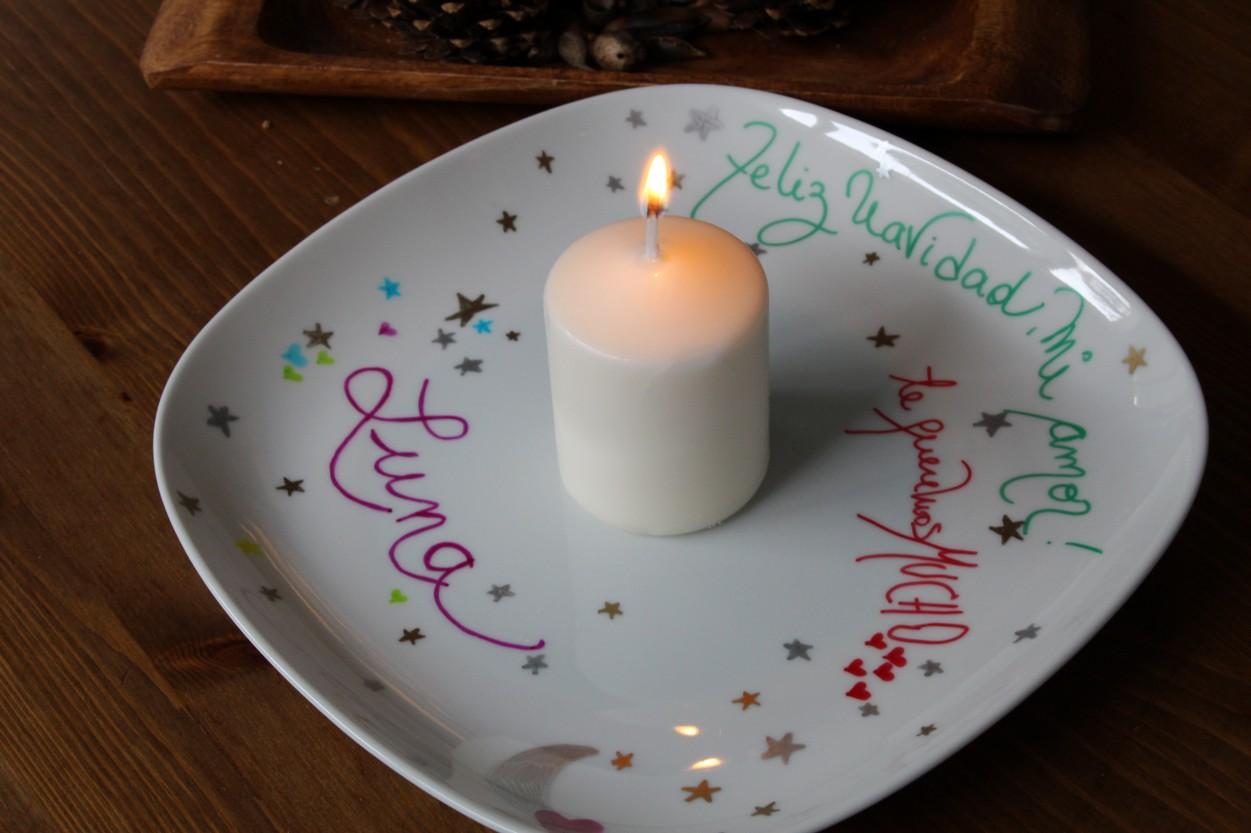
So I bought a dish.
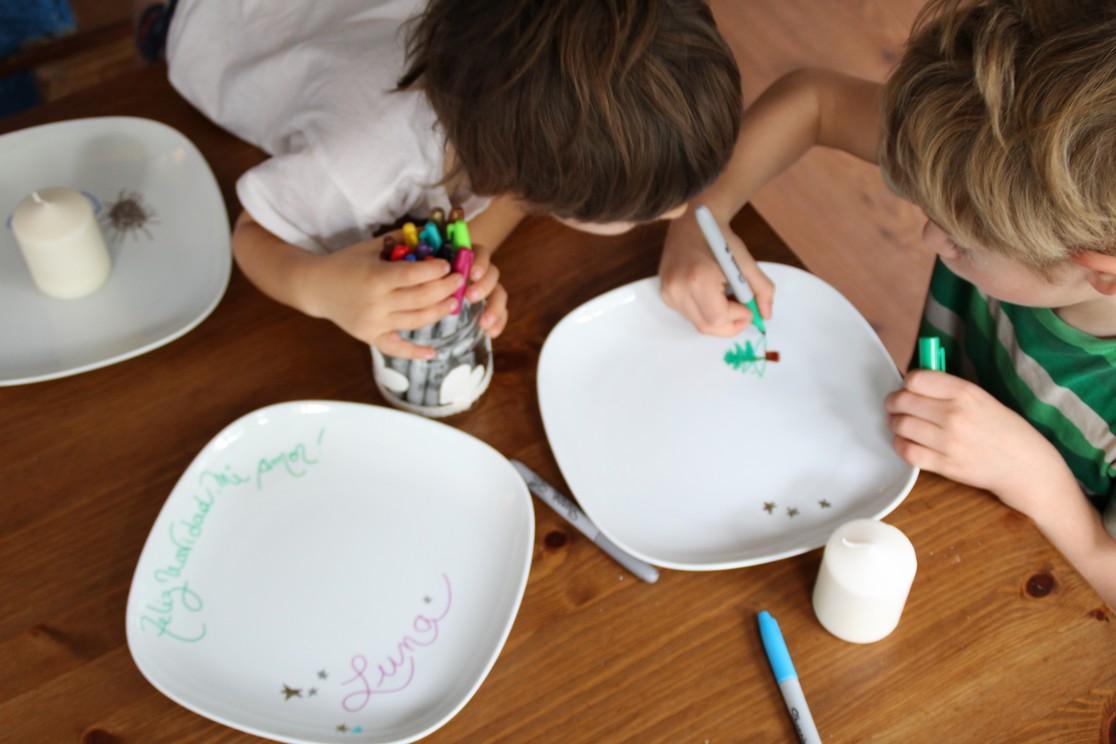
Well... I bought three. The boys had one each, too.
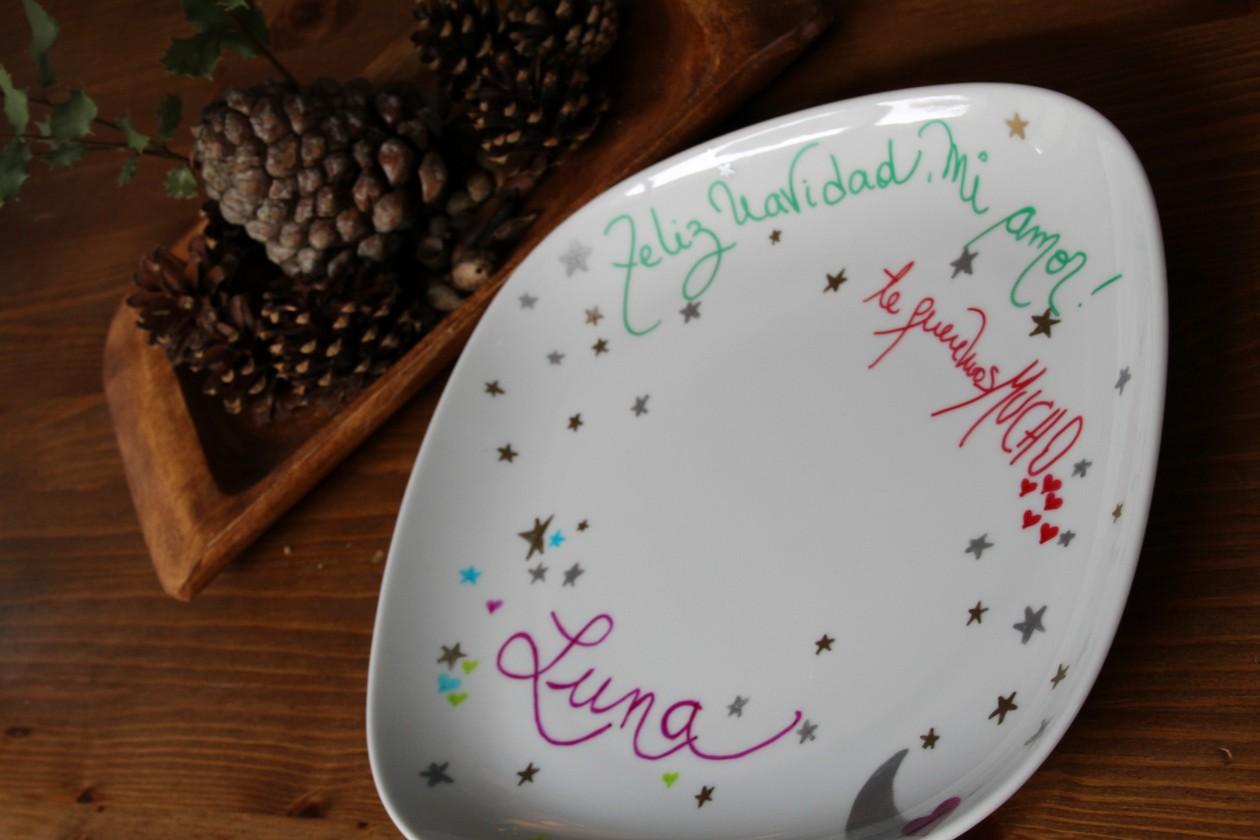
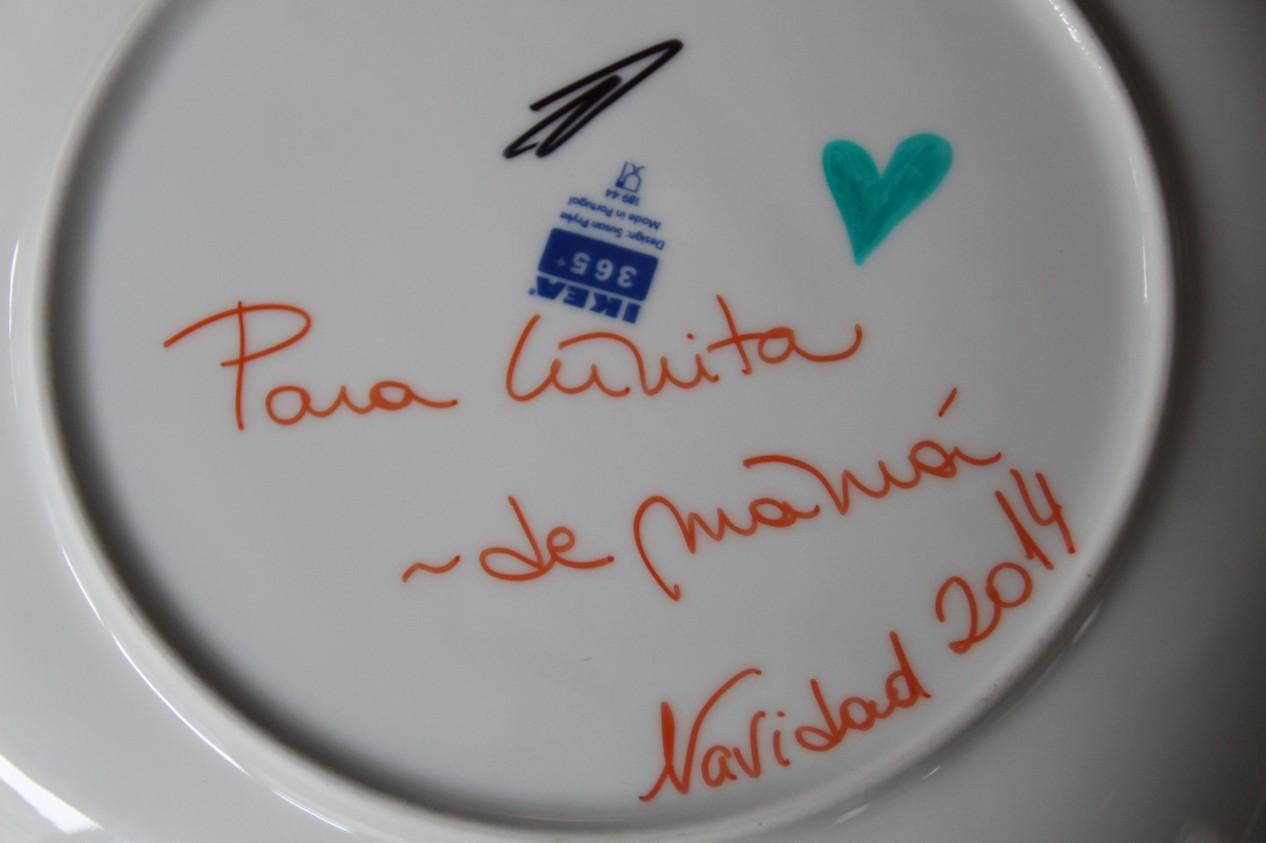
And I decorated it. I used permanent markers and had a moment with my girl Luna.
Every night, or every day... whenever I need to feel her warmth, to connect with my baby and have a moment with her, I light a candle in its center.
During the day, on our walks, exploring, going places, I keep my eyes open. Some days I come home with a leaf, an acorn, a twig. Another day I wrote Luna a little love note. I made a red felt heart. I cut little stars out of shiny silver paper. It all goes around her plate. Luna's Christmas plate, decorated with love. Built little by little, as we wait for Christmas night. In the cold, dark, snowy night, I will again light that candle, get close, and say Namasté: I honor the light within you. I celebrate the divine in you. I love you, my girl. Thank you for creating this together.
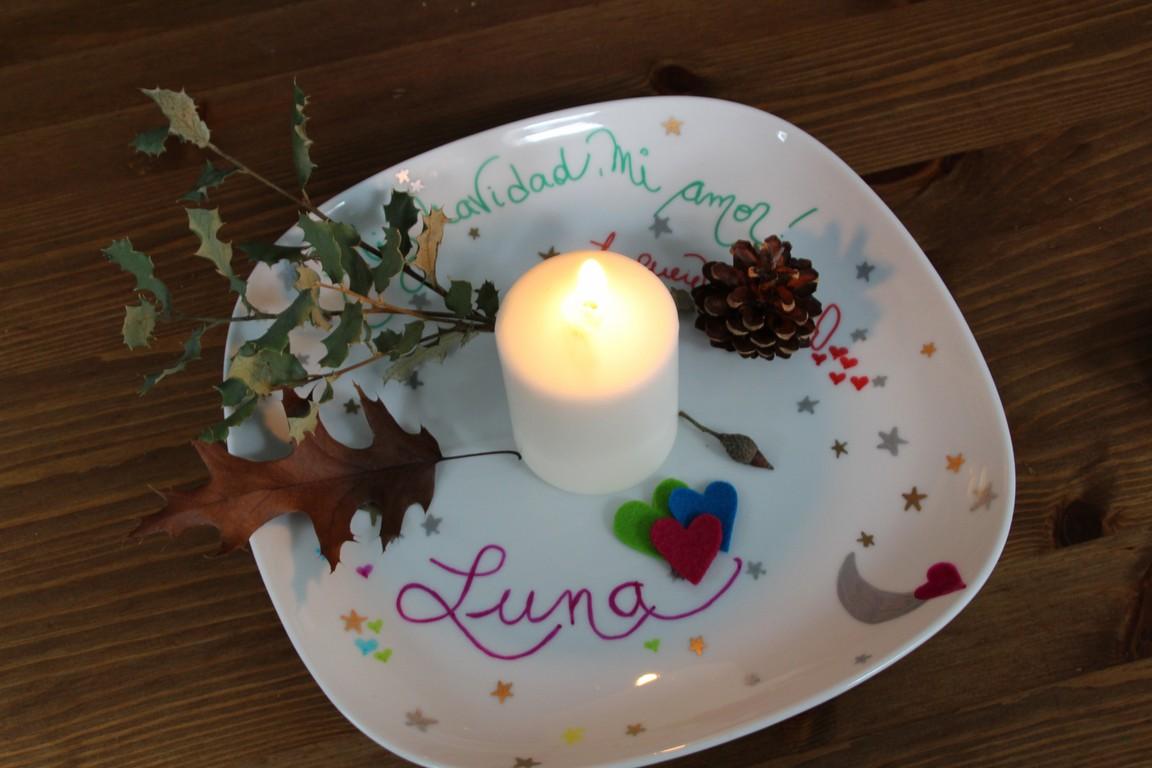
If you want to be able to wash the plate multiple times, it might be a good idea to make the colors more permanent.
To do so, place your finished, decorated plate in a cold oven, set the temperature to 400 Fº/ 225 Cº degrees. Once it warms, time it for about 30 mins. Let oven cool without taking your plate out (all this will keep it from cracking from abrupt changes in temperature). Once cooled, remove from oven. It is now super permanent (washing by hand is recommended over dishwasher use).
Some of the colors change, thought they remain vibrant and pretty:
Red turns yellow
Green turns blue
Orange turns a slightly redder hue
Blue turns a silvery yellow shade
Light blue turns a nice dark green
Gold, silver, purple, pink and brown remain the same.
~ ~ ~
I am Cheli Blasco. I was born in Argentina. Later, I moved to NYC to get a degree in Comparative Literature and, ultimately, a husband. In Madrid, Spain, I became a mother and a doula. My two homeschooled boys keep me happy and partly crazy. Our third child, our daughter Luna, was born at 26 weeks and 5 days gestation. From the very beginning we learned that she had a syndrome that, in her case, was incompatible with life. She was born at home in a beautiful and loving birth that was heart-wrenching and healing. My blog is dedicated to her, and to everything that I am slowly learning as I mother her pure soul.
Cheli is also a regular contributor for Still Standing Magazine.
Subscribe to:
Posts (Atom)
Powered by Blogger.